
Tree Surrounds Explained
People often ask how my 370° tree surrounds are made, and some even ask if I use a special video camera of some kind. Of course no such camera exists, but I think folks might appreciate the images more if they understood the basics of the technique. I’ll start with my first experiment with the surround idea, one that popped into my head while walking across Central Park in NYC, but first a little background.
I learned years ago how to make panographs, works that combine more than one photograph. The image below from Death Valley uses two captures to create an image that can be printed at almost six feet wide while preserving good detail. The two captures are seamlessly painted together digitally.

Taking this idea a bit further, here is a panograph of Lower Ottoway Lake in Yosemite, made up of around eight vertical captures. Once painted together the resulting file is huge at over 800MB, but the detail at large print sizes is remarkable.

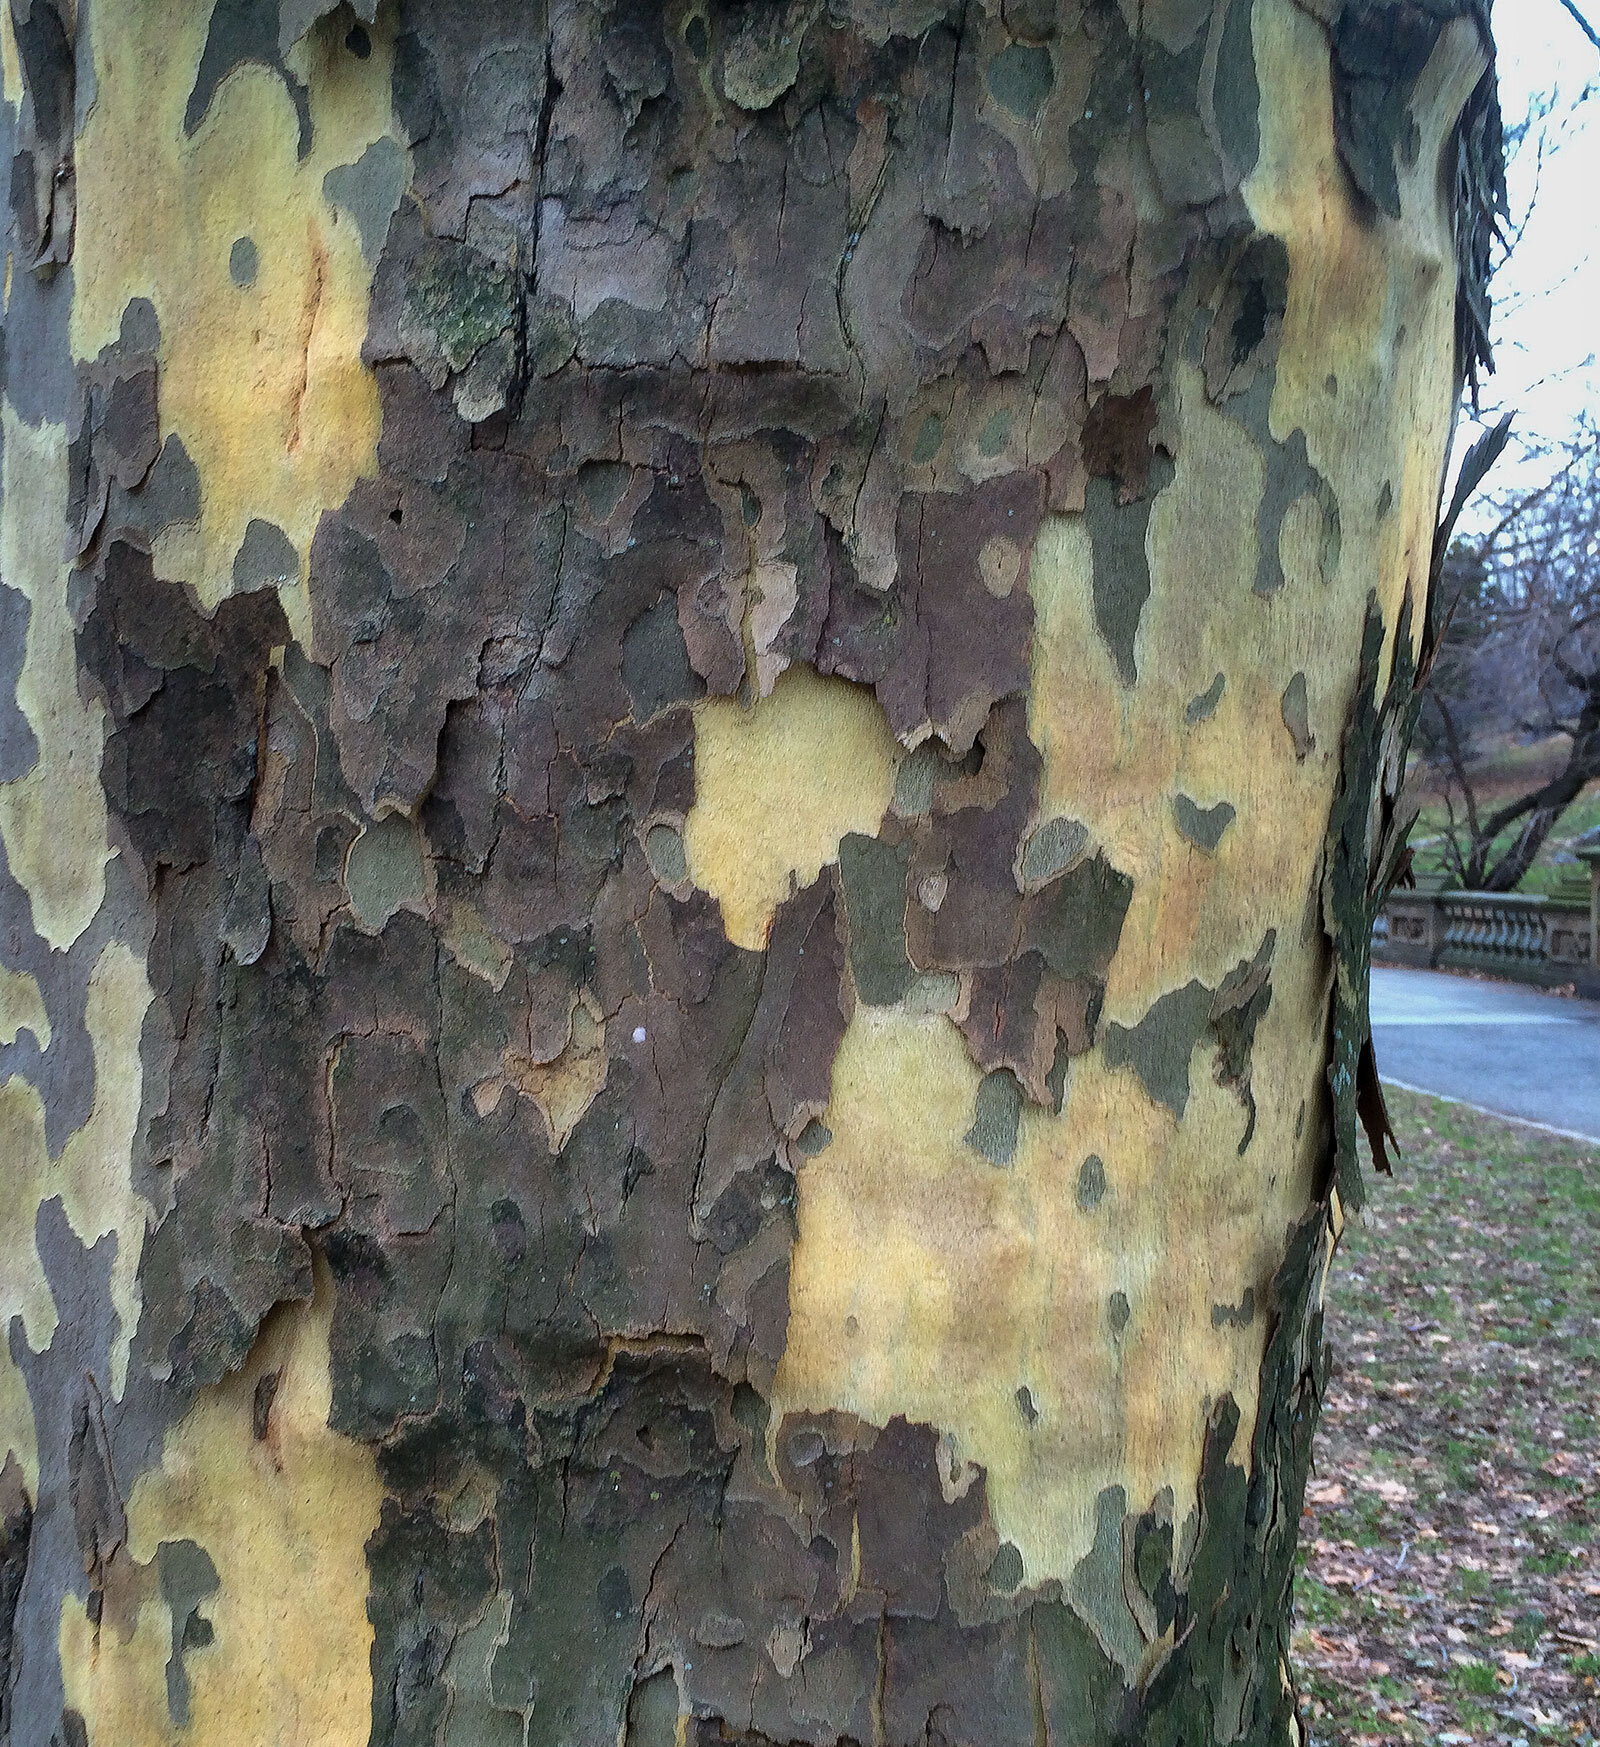
That day in Central Park I wondered if the same technique could be used to show the circumference of a tree instead of the breadth of a landscape. But at the time, it really was an experiment because I had never tried it before. Also, the only camera I had with me was an old iPhone 5. So I took just five shots, working my way around about half of the tree trunk, an amazing English plane tree with eye-catching colors and textures. Here they are as they came out of the phone/camera.
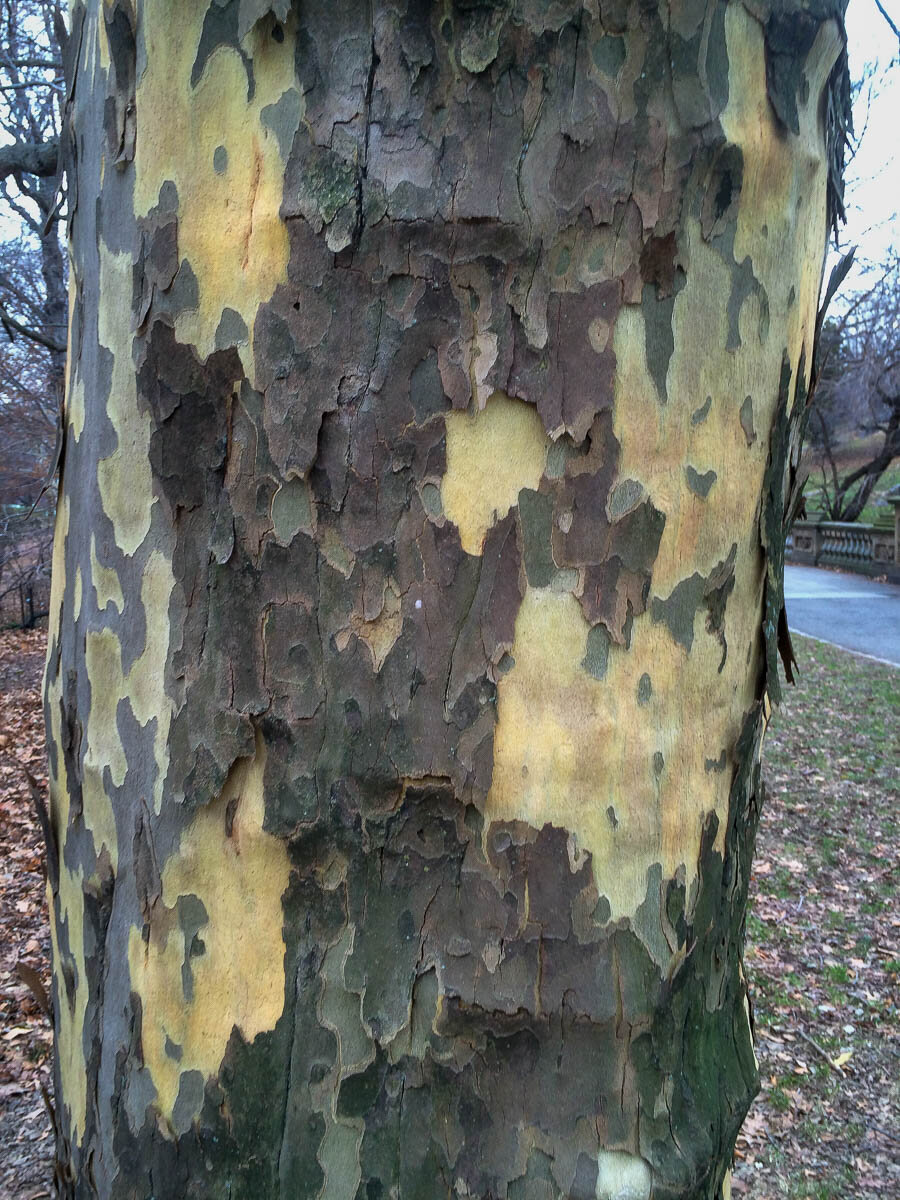
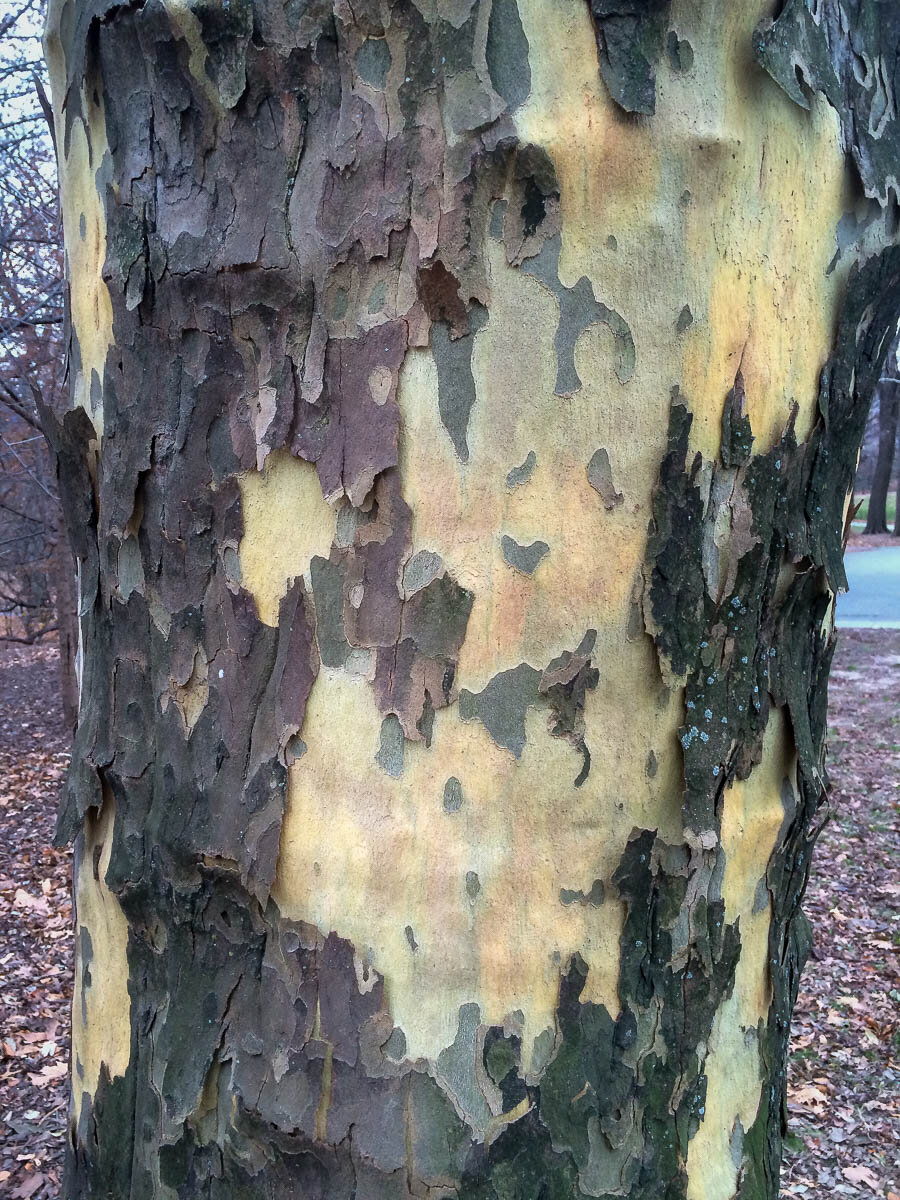
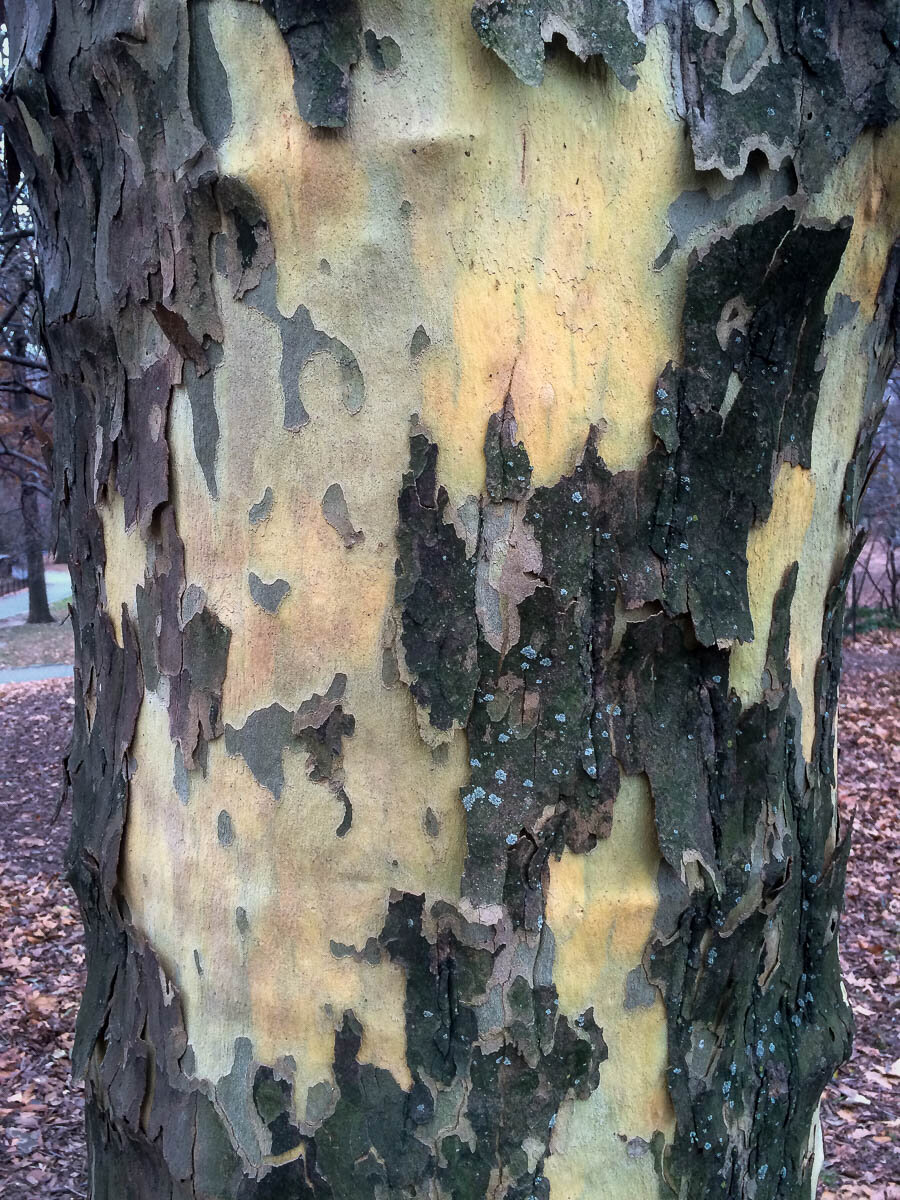

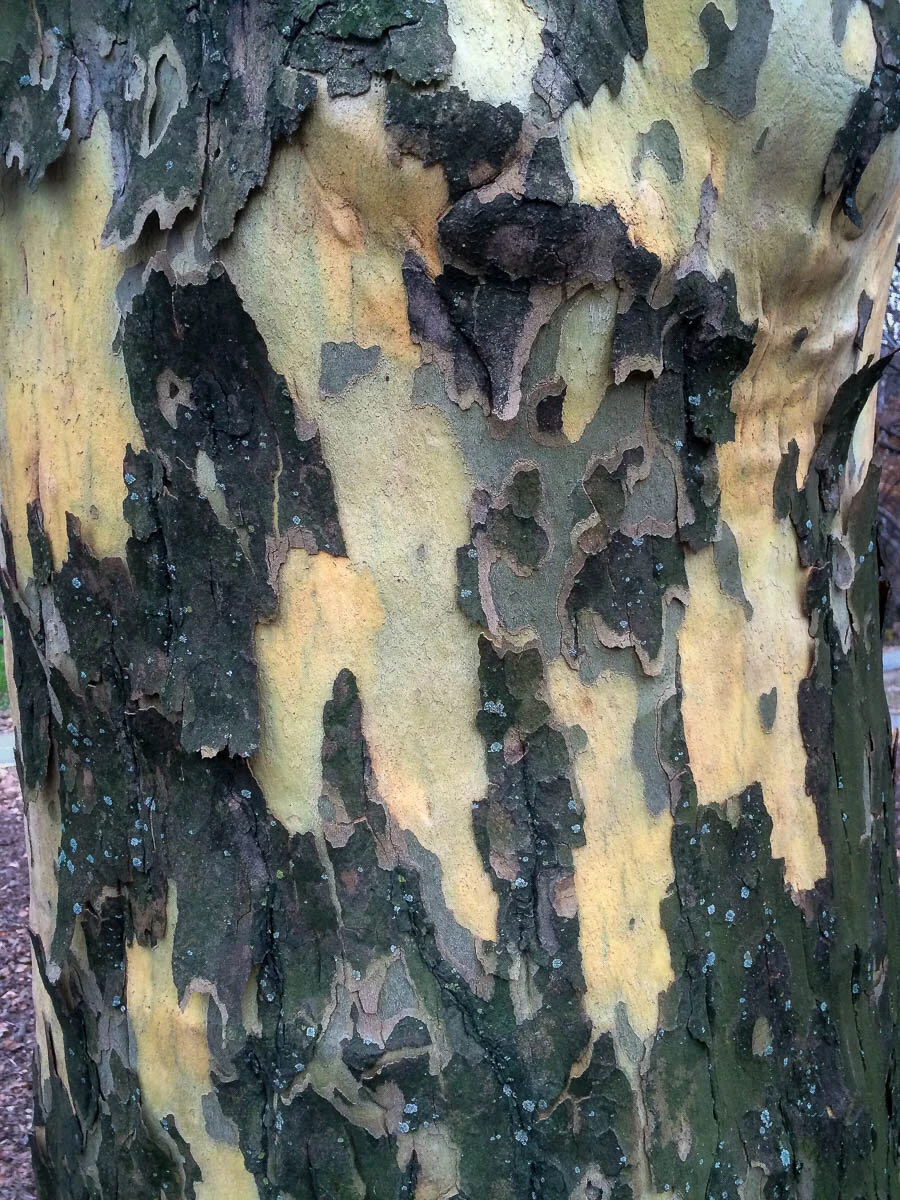
If you look closely, you can see that each image in the strip rotates slightly to the left since I was working around to the right. You’ll also see how important it is to keep the camera the same distance from the tree with each shot to keep the details the same size. By the last image I was quite a bit closer to the the tree than in the first.
One of the key things about Adobe Photoshop (a wonderful piece of software for creatives of all sorts) is the concept of layers. Imagine taking prints of the five images above and stacking them in a pile. You can only see the top one unless you begin to spread them out to the right so they’re partially overlapping each other so you can see part of each one.
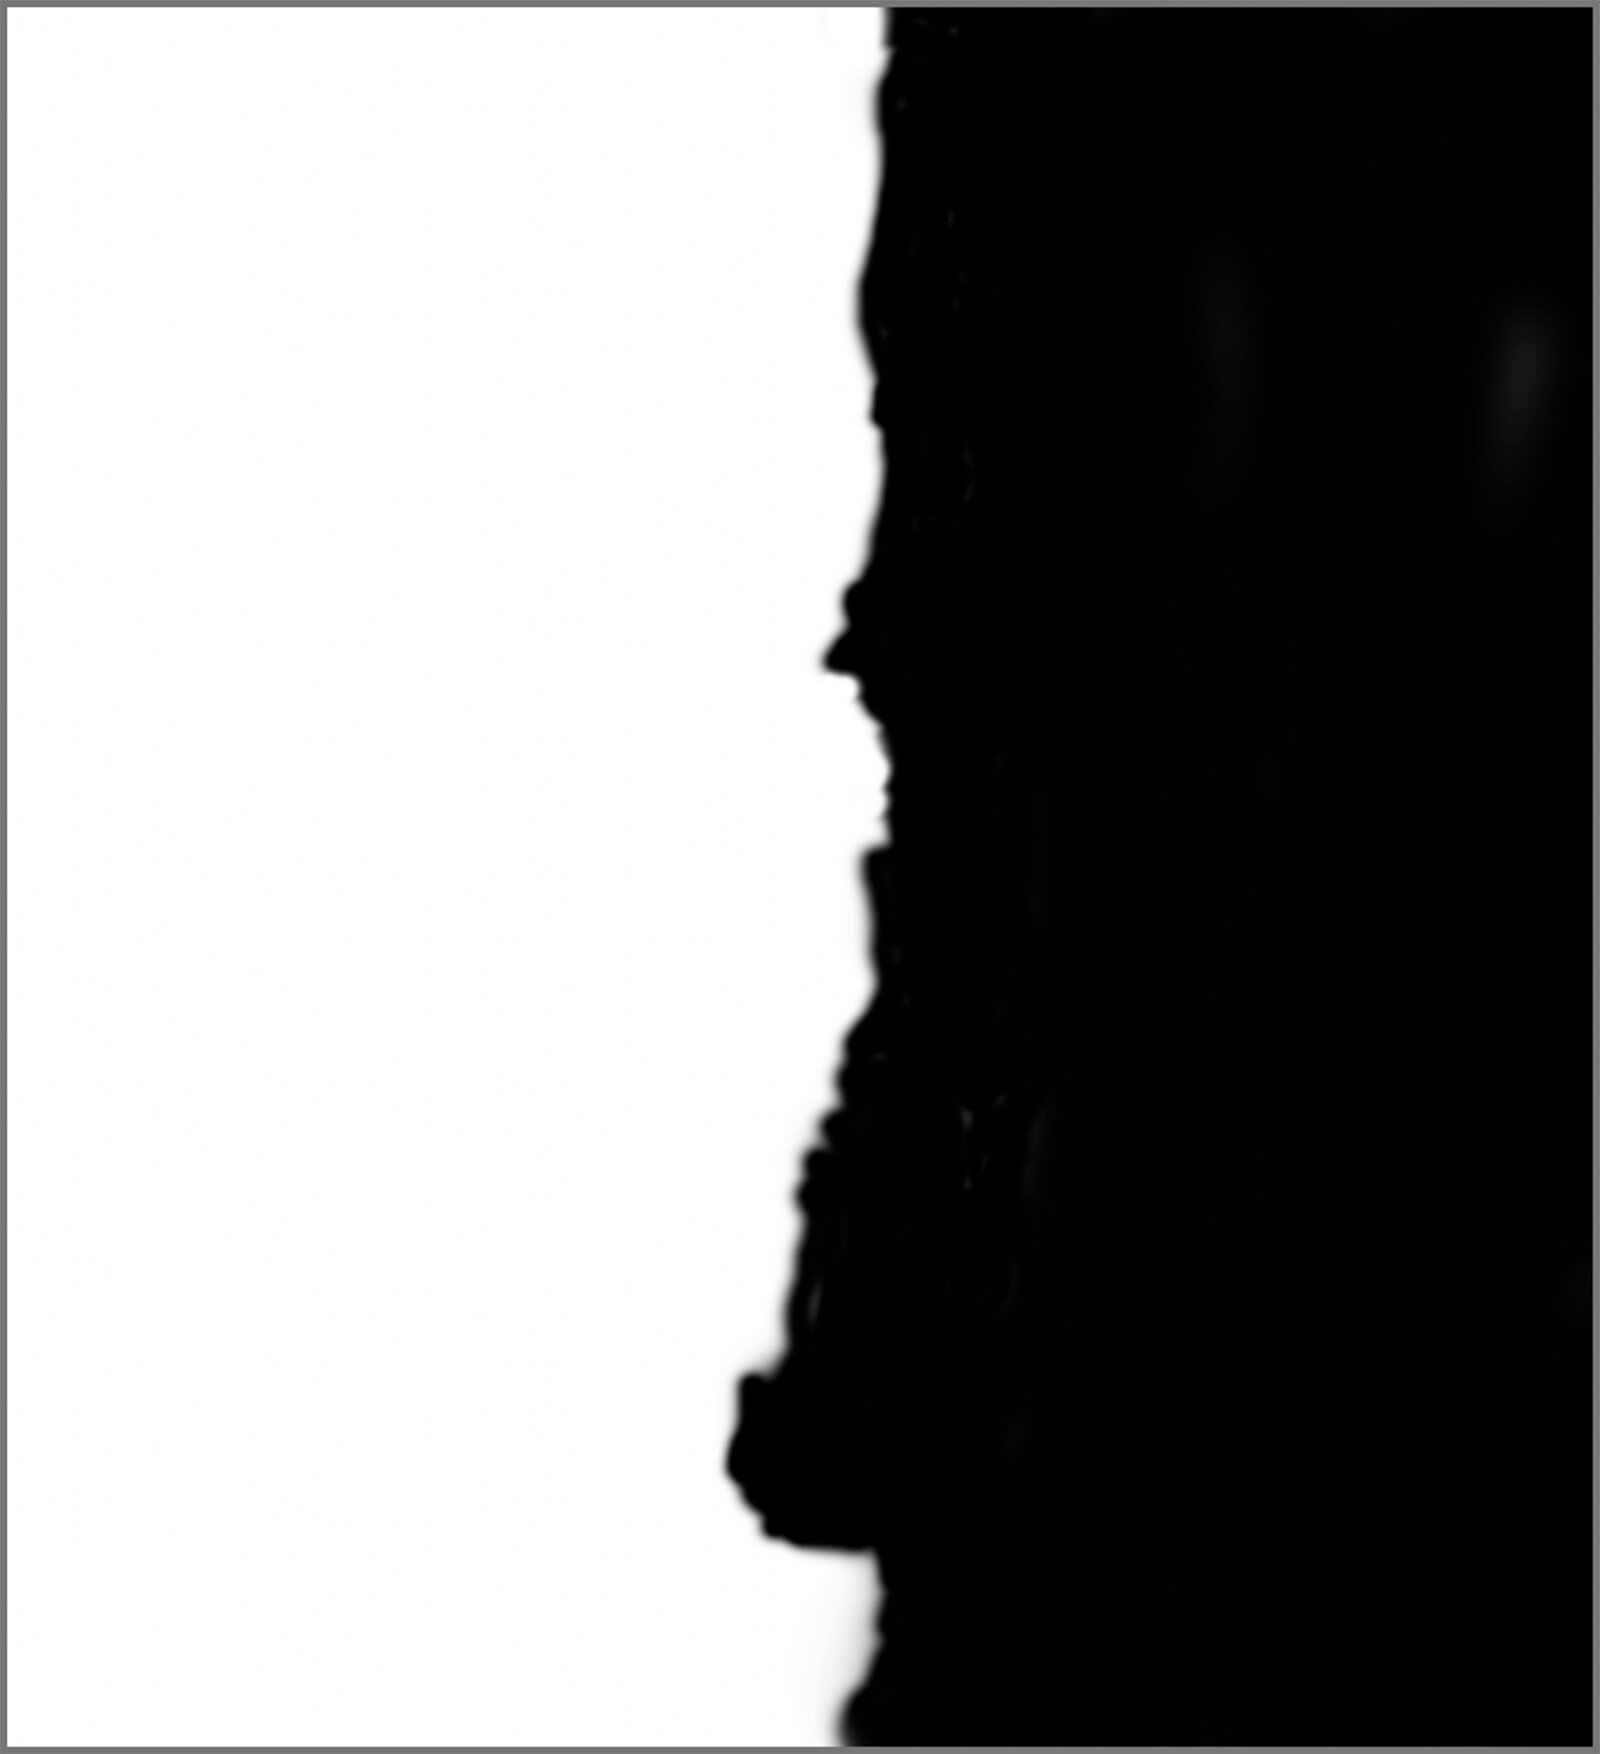
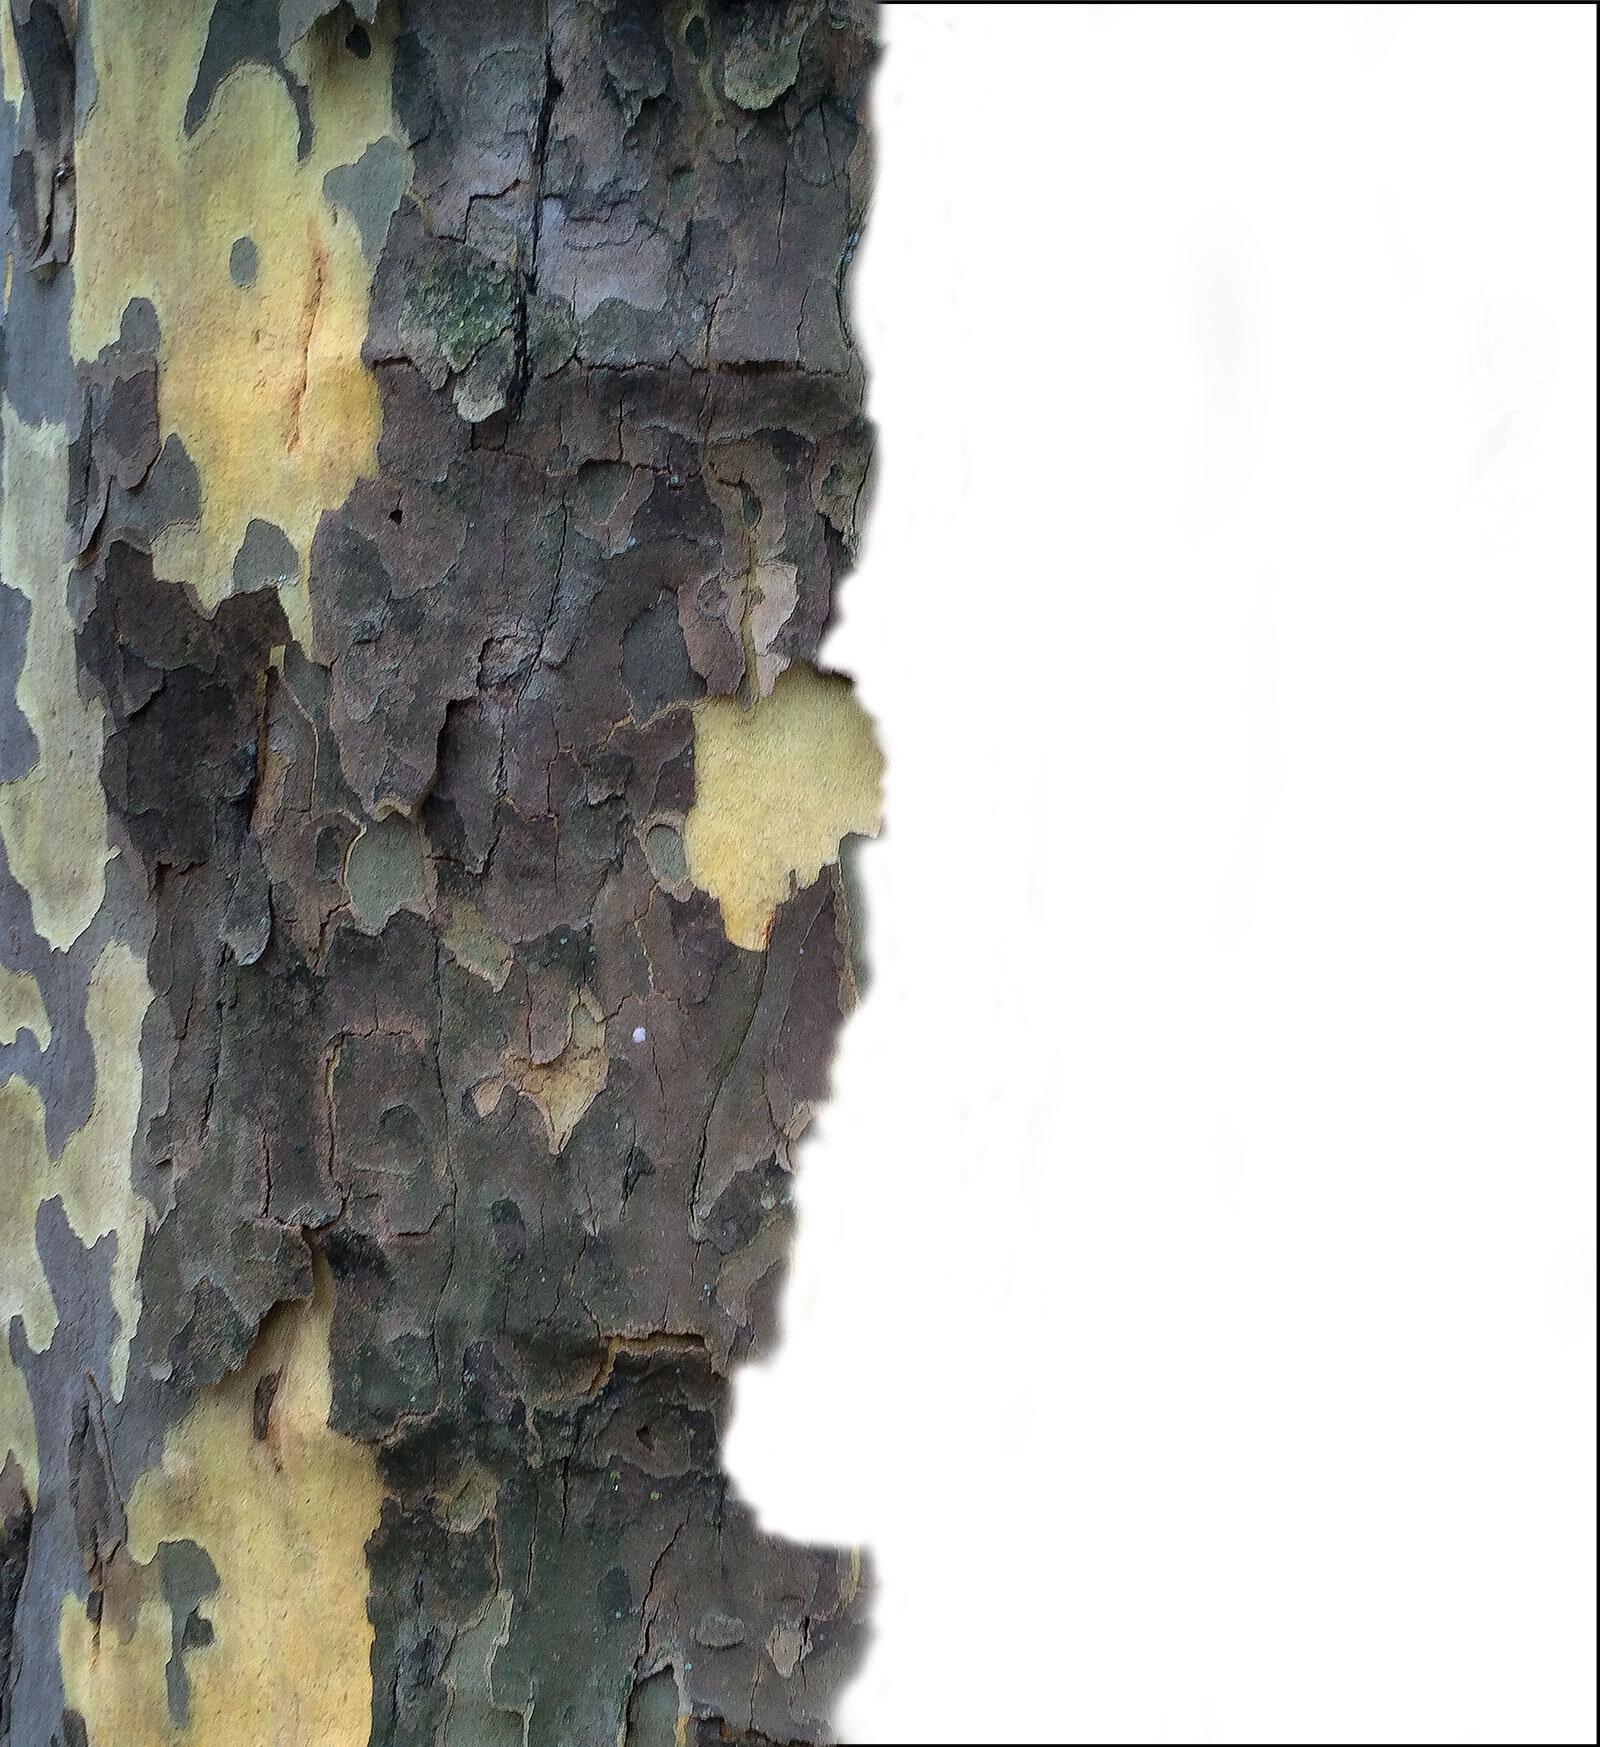
Then, imagine if you could hide part of one layer so you could see through it to the one below. This is key to understanding how layers work in Photoshop. On the left is the first photo in the stack with the left side cropped so the background doesn’t show. The center image shows the mask I painted (literally, with a stylus on a tablet) to hide the right side of the image. Where you see black, that part of the image will become invisible and allow next image in the stack to show through. The image on the right shows the effect of the mask.
Next is an illustration of what the five puzzle pieces look like before final assembly. It isn’t totally accurate because I only have to mask the right side of each layer since they overlap, but this gives you a clearer view of how the details in the bark connect to form a seamless rendition.

Last, here is the finished image after adjusting color (it was a cloudy day with bluish light as you can see in the visible backgrounds) and contrast. It isn’t perfect but since the goal was to create an impressionistic view of an English plane tree, I think it works pretty well. The same basic technique was used to make the other surrounds in the Trees collection, but with more layers and much better cameras.

If you would like to learn more feel free to email me.